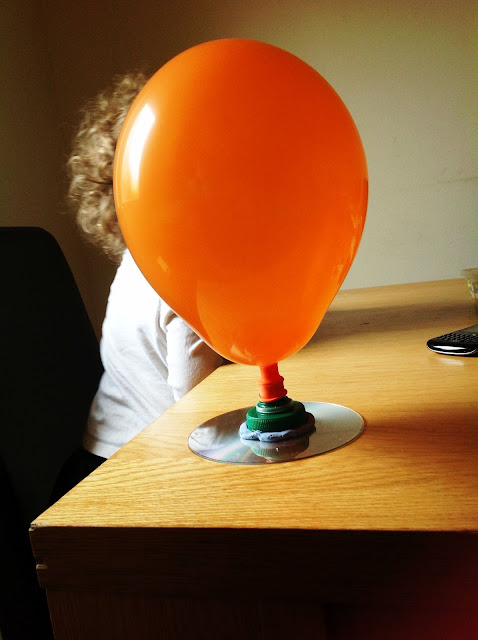
This is possibly the best toy you can ever make yourself. We did this at one of our Science home ed groups well over a year ago now and when looking about the web there are many ways that people put them together but, through trial and error, this is the best way we found.
What you will need to make your own mini hovercraft:
- A balloon
- A sports cap top (We used a Fruit shoot one but anything like it will work)
- Modelling clay or Blu Tak
- An old CD or a cheap one from a charity shop
What you will need to do is really simple:
STEP ONE
Attach a balloon to the end like this:
It's best if you blow your balloon up once before you do this as it will make the next stage easier to do.
STEP TWO
With the sports cap open blow up your balloon like this:
You can try to inflate you balloon and then attach it to the closed sports cap. I broke a few balloons doing this so I did a slightly different way...
Be careful doing this - I blew through the sports bottle cap and it will fill the balloon but remember to hold the actual neck of the balloon in between blows so the air doesn't escape from the balloon in between breaths. When you have finished close the sports cap so the air can't escape.
STEP THREE
Get your old CD and a piece of modelling clay like this:
STEP FOUR
Roll the piece of modelling clay in a thin sausage shape so it looks a bit like in the photo above then...
STEP FIVE
Put it round the CD like this.
Put it round the CD like this.
STEP SIX
Put your sports cap with the attached blown up balloon on top so it looks like this:
Then you are ready to play!
You will need to work quite quickly but what you need to do is simple: all you need to do is open the sports cap, carefully so not to damage the balloon. Then, before the balloon runs out of air, give it a gentle push. The Hovercraft will move until the balloon runs out of air!
Why does this happen?
When the balloon is inflated all it wants to do is deflate. When you open the sports bottle cap this is what it does and the air that was inside the balloon is forced down through the sports bottle cap to underneath the CD.
When this happens a cushion of air is created for the CD to glide along the floor. This cushion of air is what pushes the CD slightly off the floor, reducing its friction so after the little push it sails along. Less friction means the hovercraft can travel further without coming to a stop, what eventually stops it from moving is when it runs out of air.
Other things you might like to try with this science project:
- Make two of them and race them. Just because.
- Use two different sized balloons and see which one travels further.
- Measure the volume of air your balloon is holding using Archimedes' principle. That is the volume of water displaced is equal to the volume of whatever displaced it. If you want to know how you can do this there is a link to my Archimedes experiments here.
- You could try using something different to the CD like some cut out corrugated cardboard into a disc shape, or some polystyrene foam (this can get messy) anything you can think of that can be made into a disc shape. It's science after all so experiment!


We may a hovercraft but used an ice-cream tub and a blow up bed pump!
ReplyDeleteFantastic. Did you blog about it? Have you got the link? I'd love to see :)
DeleteThis looks brill. Hours of fun for my boys!!
ReplyDeleteBrilliant! :)
Delete